Monday, 25 May 2015

SONY WALKMAN ALBUMS MOVIES PORTED FOR JB/KK

SONY WALKMAN™ | The Best Clear Audio Experience (jb/kk)

FEATUREs :
• Latest WALKMAN build 8.5.A.3.2
• New and fresh UI
• Clear audio setting | SoundEnhancement
• Clear audio+
• Equalizer preset (such as Rock, Easy Listening, Jazz, etc)
• Manual mode of preset (Custom and User-defined)
• Clear bass
• Clear stereo
• S-force Front Surround
• Surround Sound VPT (Soundstage option)
• Dynamic normalizer
• Visualizer
• Album art
• Adjust background color following album art
• Music control on notification
• Edit Music Info
• Download Music Info (work on v3.5+)
• SensMe
• Throw function (on v3.5+)
• DLNA/Media server (on v3.5+)
• Qualcomm bass boost (only work for device with snapdragon chipset)
• xLoud (Actived by default) can't settings
• Additional the libs, and files make a more awesome sound output
REQUIREMENTs :
• Rooted
• Deodexed/Odexed (Deodexed is recommended)
• Custom recovery | CWM, TWRP, PhilZ Touch, etc
• Free 40 - 50 MB of memory system ROM on your device
• Used ROM base on Jelly bean 4.1.2, 4.2.2, 4.3.x and KitKat 4.4.2 like AOSP/CM10.2/CM11/PA/AOKP/MIUI/Liquid smooth etc
DOWNLOAD HERE 
 check the instructions too.
*i m not responsible for a bricked device. do it on your own risk. 

Sunday, 24 May 2015

HEATING PROBLEMS IN ANDROID

How To Solve Heat Problem In Your Smartphone

Mostly Android Users Face The Heating Problem With Their Android Smartphone , Some Users Face Heating Problem While Playing Game Some Face Heating Problem Just By A little Bit Use , Heating Of Android Phones occur Mostly Due To Some Apps Running in Back Ground . Those Apps are use less and May push Your android Phone To Heating problem .

And Some Times Heating Of Android Phone Occurs Due To Hardware Failure issues , If There is a Hardware Issue With Your Android Smartphone And it is Giving excessive heat , Then You have to seek Help From Your Nearest android Service centres , Because Android Phone Heating issues  Due To Hardware Malfunction / Failure aren't Possible to Be solved By Software Tweaking . 
The heating in your droid maybe because of RAM and CPU usage so controlling this might be helpful ie by closing apps and not allowing them to work in background

HOW TO SOLVE THIS ?

FOR NON ROOTED USERS
Try this app
This can boost your nonrooted phone everytime u ask for a boast

Another best app to boast your device and to make it cool is this
*for its material ui and easy interface


FOR ROOTED USERS

BASIC REQUIREMENTS

  • ROOTED ANDROID (ICS+)
  • XPOSED INSTALLED
  • PATIENCE


* DO AT YOUR OWN RISK I WOULD NOT BE RESPONSIBLE FOR A BRICKED PHONE

*for instructions to install xposed check my previous posts

Download this app here

best app for rooted users and does its work itself no need to boast the device again and again

Another good app is this

a app if set properly can change your android smartphones battery life 

App list is too long and many on beta version so be connected for updates i m testing them 

Saturday, 23 May 2015

IOS STATUS BAR FOR KITKAT (4.4)


BASIC REQUIREMENTS

  • ROOTED ANDROID (ICS+)
  • XPOSED INSTALLED
  • PATIENCE
  • A WORKING BRAIN :P


* do at your own risk i would not be responsible for a bricked phone

*for instructions to install xposed check my previous posts

FEATURES
  • STATUSBAR
    • Signal position LEFT | RIGHT
    • Signal icons style SYSTEM | SOME STYLE
    • Carrier label with custom text
    • Notification icons SHOW ICONS | SHOW ICONS COUNT
    • Clock position LEFT | CENTER | RIGHT
    • Clock size
    • Battery style SYSTEM | SOME 5 OTHER STYLES
    • Battery percentage SHOW | HIDE
    • Battery percentage size
    • Tinting
  • NOTIFICATION PANEL
    • Blurred background
    • Background dim color #00000000 ... #FFFFFFFF
  • RECENT PANEL
    • Blurred background
  • WHITE KEYBOARD
  • WHITE SETTINGS APP

    DOWNLOAD

Friday, 22 May 2015

LOLLIPOP RECENT PANEL FOR ANDROID


BASIC REQUIREMENTS

  • ROOTED ANDROID (ICS+)
  • XPOSED INSTALLED
  • PATIENCE

* DO AT YOUR OWN RISK I WOULD NOT BE RESPONSIBLE FOR A BRICKED PHONE

  • *for instructions to install xposed check my previous posts

DOWNLOAD THE MODULES YOU WANT:

– Firstly, note that some modules work on all devices and some work for specific mobile brands.
Download this xposed module form this link.
Install the module and reboot your device.
open the app any personalize the way you want it to be.
What will you personalise
  • you get a lollipop status + notification bar
  • a recent panel like lollipop
  • dailer ui from lollipop (few devices)
  • animations from lollipop
  • for recent panel follow these screenshots

 select the experimental notification settings from the system ui and reboot is must.

Thursday, 21 May 2015

LOLLIPOP UI (ALMOST PURE) FOR ROOTED USERS

BASIC REQUIREMENTS

  • ROOTED ANDROID (ICS+)
  • XPOSED INSTALLED
  • PATIENCE
  • A WORKING BRAIN :P

* do at your own risk i would not be responsible for a bricked phone

A FEW POINTS TO BE NOTED BEFORE STARTING:

  1. Rooting your phone is mandatory if you want to use Xposed Installer. For rooting, you can get a guide anywhere over the internet or you can comment below so that I can help you out.
  2. If you are an android gingerbread user, you will have to use another version of the app. More info is provided in this thread.

PART 1: INSTALLING THE XPOSED FRAMEWORK:

1. Download app – Xposed Installer Apk
2. Install and launch the app, go to the section named ‘Framework’ and click on ‘Install/Update”
3. It will ask you to reboot your phone. Just press that reboot button and you have successfully installed the framework!
How to install Xposed

PART 2. DOWNLOAD THE MODULES YOU WANT:

– Firstly, note that some modules work on all devices and some work for specific mobile brands.
Download this xposed module form this link.
Install the module and reboot your device.
open the app any personalize the way you want it to be.
What will you personalise
  • you get a lollipop status + notification bar
  • a recent panel like lollipop
  • dailer ui from lollipop (few devices)
  • animations from lollipop


 for quick toggles

use power toogles from play store or u may use notification toggles / settings extended 


TURN YOUR KITKAT DEVICES TO LATEST LOLLIPOP UI

FOR NON ROOTED USERS

Android 5.0 Lollipop wallpapers

Android 5.0 Lollipop’s Material Design is much more mature and stylistically uniform throughout the entire system than KitKat ever was, no stone has been left unturned by Google’s developers when implementing the design changes. The wallpapers match this new look perfectly, and you can already download them. Install Android 5.0 Lollipop wallpapers

androidpit android lollipop wallpaper
I was able to use Lollipop wallpapers right on my Nexus 5 which runs Android 4.4.4 KitKat. / © ANDROIDPIT

Android 5.0 Lollipop Messenger

Google also introduced a new SMS and MMS app with Material Design. Messenger is a lot cleaner looking and user friendly than Hangouts, however it doesn’t combine your Hangouts messages. Google has basically gone back to the old system of two separate apps: one for text messages and one for messages using mobile data. Install Lollipop Messenger

androidpit lollipop sms 2
A quick look at Google's new messenger app. / © ANDROIDPIT

Android 5.0 Lollipop Keyboard

There was an Android L keyboard available since the Google I/O but this required root. Now anyone can install the APK right from the XDA developer website. First we would recommend uninstalling any previous Google Keyboard app, then head to XDA and install the APK. 
Once the Keyboard is installed, it will guide you on how to properly set it up, from switching it on in your settings, to making it your primary keyboard, to adding more languages. Make sure you go into the Lollipop Keyboard settings and choose either Material Dark or Material Light design. Install Lollipop Keyboard.

androidpit android lollipop keyboard
The Android 5.0 Lollipop Material Light is especially nice! / © ANDROIDPIT

The latest version of the Google Play Store

The Google Play Store had already received a Material Design update a while back, but the most recent update spreads the new user interface changes throughout the entire app, including a flatter icon, new animations and colors. Install the Google Play Store version 5.2.

androidpit google play store update version 5 1 1
Android 5.0 Lollipop also brings a new Play Store, which you can install now. / © ANDROIDPIT

Android 5.0 Lollipop sounds

In addition to having an Android 5.0 look and feel, what about sounds? You can make your phone sound like it’s got Lollipop running by simply installing the APK. Install Android 5.0 Lollipop sounds.

Nova Launcher

Though the APKS above will bring you individual components of Android Lollipop, there’s not much to speak of the functionality level. To get this, you could also just install the Nova launcher which will bring a bunch of new features that are very similar to Android 5.0.
For example, you will get Lollipop Circle Folder Animations, scroll indicator, icon themes for calculator, clock, contacts, downloads, email, dialer, settings and SMS apps and a preview of the scroll effects in the settings.
You will need to install some of the individual apps above to make the look complete though, like the wallpaper APK. Try out various combinations to see what you like the best.download.

androidpit nova launcher lollipop features


Rooting lava iris x8 and other 4.4.2 devices


How To Root Lava Iris x8 With Computer 

Prerequisites Before Root Lava Iris x8 

  • Make sure your lava iris x8 is full charged 
  • Wifi or 3g is recommended to Root lava iris x8
  • Patience is recommended


We are not responsible for any kind of damage caused to your device while rooting , Better you Do Any Thing At Your Own risk .

  • Enable usb Debugging in your lava iris x8 
  • Now Start Installing all The Drivers and Everything that was present in the Root Lava iris x8 package .
  • After installing all the Software's and files 
  • Download and install The Kingroot app .
  • Install the Setup .
  • Connect Your Lava iris x8 To Computer .
  • The KingRoot Software will Detect that and will Show your Device name On the Screen .
  • Now After the Device is Connected Click on The ROOT LAVA IRIS X8 Button .

  • How To Root Lava Iris x8 Without Computer 

    Prerequisites Before Root Lava Iris x8 (not tested on other devices but must work)
    • Make sure your lava iris x8 is full charged 
    • Wifi or 3g is recommended to Root lava iris x8
    • Patience is recommended


    We are not responsible for any kind of damage caused to your device while rooting , Better you Do Any Thing At Your Own risk .


Sunday, 17 May 2015

Instalar CWM Recovery con MTK Droid Tool


Leer antes de empezar


No me hago responsable por cualquier daño o perdida que le hagas a tu dispositivo, RESPALDA LA INFORMACION que tengas en el dispositivo, usalo bajo tu propia responsabilidad

Tambien debo recalcar que pueden existir restricciones con ciertos chips/telefonos y el cual no estan detallados en esta guia, asi que como dije antes, usalo bajo tu propia responsabilidad

Esta es una guia para telefonos con chip Mediatek


Requisitos


  • Debes tener una copia de seguridad del ROM que tiene actualmente instalado, para cear una copia de seguridad sigue esta GUIA, el archivo que nos interesa en esta guia es el: boot.img, NO USES EL DE OTRO TELEFONO, INCLUSO SI ES EL MISMO MODELO Y ROM
  • Activar en el telefono la opcion: Depuracion USB
  • El telefono debe estar rooteado, con esta guia puedes rootearlo
  • Instalar en el telefono Busybox, ejecutar y click en: Install (Si esta aplicacion no instala el busybox, intenta con el MTK Droid Tool, aunque tambien no funciona en todos los modelos)
  • Descargar y extraer MTK Droid Tool 
  • Drivers del telefono, AQUI en esta guia lo encontraras
  • Cable USB
  • Computador con Windows


Instalar CWM Recovery


  • Conecta el telefono al computador
  • Ejecutar como Administrador: MTK Droid Tool
  • Espera a que reconozca el telefono, pendiente del telefono ya que puede pedir permisos de root
  • Click en el boton: ROOT (si no instalastes el Busybox, en este paso se instalara)
  • Debe aparecerte en la esquina inferior izquierda: MODELO DEL TELEFONO (root shell)
  • Click en la pestaña: Root, Backup, Recovery
  • Activar la opcion: selecciona el archivo boot.img
  • Click en el boton: Recovery y boot y te pedira buscar el archivo boot.img, recuerda seleccionar el boot.img de tu telefono
  • Te mostrara tres mensajes, le dices que si a todos ellos
  • Al terminar te pedira reiniciar en modo recovery o si quieres hacerlo tu mismo, apaga el telefono, presiona Volumen+ y Power al mismo tiempo hasta ver el menu del CWM Recovery
  • Listo, CWM instalado!


Imagenes de telefonos flasheados con exito


BLU Studio 5.0 II


BLU Studio 5.5


Publicado en tttony.blogspot.com

Crear copia de seguridad de ROM con MTK Droid Tool


Leer antes de empezar


No me hago responsable por cualquier daño o perdida que le hagas a tu dispositivo, RESPALDA LA INFORMACION que tengas en el dispositivo, usalo bajo tu propia responsabilidad

Tambien debo recalcar que pueden existir restricciones con ciertos chips/telefonos y el cual no estan detallados en esta guia, asi que como dije antes, usalo bajo tu propia responsabilidad

Esta es una guia para telefonos con chip Mediatek


Requisitos


  • MUY IMPORTANTE! Es obligatorio hacerle un hard reset (no soft reset) al dispositivo NO OLVIDES HACER EL RESPECTIVO RESPALDO DE INFORMACION, ya que asi tendras una copia 100% limpia de archivos y configuraciones personales, es bueno hacerlo ya que si planeas compartirlo en internet, tus archivos personales no los accedera mas nadie
  • Activar en el telefono la opcion: Depuracion USB
  • El telefono debe estar rooteado, con esta GUIA puedes rootearlo
  • Instalar en el telefono Busybox, ejecutar y click en: Install (Si esta aplicacion no instala el busybox, intenta con el MTK Droid Tool, aunque tambien no funciona en todos los modelos)
  • Descargar y extraer MTK Droid Tool 
  • Drivers del telefono, AQUI en esta guia lo encontraras
  • Cable USB


Crear copia de seguridad


  • Conecta el telefono al PC o laptop
  • Ejecutar como Administrador: MTK Droid Tool
  • Espera a que reconozca el telefono  
  • Click en el boton: ROOT
  • Debe aparecerte en la esquina inferior izquierda: MODELO DEL TELEFONO (root shell)
  • Click en la pestaña: Root, Backup, Recovery
  • Click en el boton: Backup y espera a que termine de copiar la ROM del telefono, puede llevar tiempo
  • Luego de terminar la copia, te muestra un mensaje de si quieres empaquetar y le dices que no
  • Los archivos del ROM lo encontraras en una carpeta llamada backups dentro de la carpeta del MTK Droid Tool
  • Comprime y guarda la copia en un lugar seguro o mejor aun, subela a un servidor de archivos


Publicado en tttony.blogspot.com

Monday, 11 May 2015

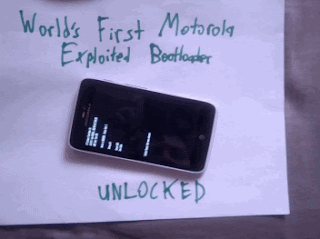
Unlock Bootloader Tool For Motorola Atrix HD, RAZR MAXX HD, RAZR M, DROID RAZR HD

As we know for a security purpose Motorola decided to set their phones with bootloader locked, so we are forced to firstly unlock the bootloader if we need to do number of activities that will be stopped if the bootloader is locked. But thanks to those who think about this problem, they come out with method to get rid the said limitation.
Advertisements.

For example those who own Motorola Atrix HD, RAZR MAXX HD, RAZR M and DROID RAZR HD can unlock their device bootloader. Thanks to a famous researcher Dan Rosenberg to makes this possible, he has given the result publicly showing the unlocked bootloader of those devices to us. Not only that the man also has released its tool, has explained what is and also has elaborated all the necessary steps to unlock bootloader of Motorola Atrix HD, RAZR MAXX HD, RAZR M and DROID RAZR HD using his tool.

Unlock Bootloader Motorola Atrix HD, RAZR MAXX HD, RAZR M and DROID RAZR HD
The method has been tested and proven work to deliver freedom for the devices so we can further perform unofficial operations that are impossible in the bootloader locked Motorola device.

Unfortunately this method doesn't work on the OMAP processor powered devices such as OG RAZR / MAXX as they use completely different security system that until this post written remained uncracked.

For those who have unsupported device,  then you can proceed to my previous post called how to unlock bootloader on any Motorola devices.

If you are owner of one of the supported devices, you can now unlock your Motorola device's bootloader. Dan has posted the how to guide tutorials publicly for anyone with the supported device to follow.

But the indisputable requirement to do so is your device should already be rooted.

Advertisements.

Before I direct you to the instructions section containing the tool released by Dan. Please to firstly read the following.

A few words called warnings.
  • Remember performing this action will nullify your device's warranty.
  • Once your device's bootloader is unlocked, there is no way to relock it afterward. This is a one way tick, no turning back chance given. (That means if your device's lost, when it's unlocked, so there is no encrypted data anymore, so the one found your device can extract all your personal data stored in your phone.
  • No body should be held responsible for any unwanted results during or after performing the bootloader unlocking tutorials using Dan's tool.
Requirement.

Your device is rooted and "su" binary is already installed.
Instructions to unlock bootloader Motorola Atrix HD, RAZR MAXX HD, RAZR M and DROID RAZR
  1. Download Dan's tool (motopocalypse.zip) to your PC and then extract the download zip file.
    Motopocalypse
  2. For Windows OS users, be sure your computer has the newest version of Motorola USB driver that's needed by your smartphone.
  3. Be sure your phone's rooted and "su" is working.
  4. Be sure Motorola device's USB Debugging mode is set to enable.
  5. For Windows OS users, go to the extracted zip file of motopocalypse folder.
    Motopocalypse
  6. Inside the folder, execute run.bat.
    Run.Bat To Unlock Bootloader Motorola Atrix HD
  7. As for Mac OS X or Linux, execute /run.sh.
    Run SH To Unlock Bootloader Motorola ATRIX HD
Source from Dan Rosenberg blog.

Sunday, 10 May 2015

Install G530FZXXU1AOA3 (XXU1AOA3) On Galaxy Grand Prime SM-G530FZ Tutorials

The G530FZXXU1AOA3 (XXU1AOA3) is now rolling to either Over The Air update or Samsung KIES if you own a Samsung Galaxy Grand Prime SM-G530FZ a big chance you are waiting for its coming to you. But of course you can skip that boring waiting time by simply install the stock firmware release manually.
Advertisements.

Lucky you because you can follow the correct instructions from this post. And of course you need to firstly read the following few points. Do it !

Samsung Galaxy Grand Prime SM-G530FZ
Preconditions.
  1. Do not install the G530FZXXU1AOA3 (XXU1AOA3) if your device is not Samsung Galaxy Grand Prime SM-G530FZ.
  2. Root access that your phone has, will be wiped out for flashing this software.
  3. A stock recovery image will replace your CWM or TWRP or any custom recoveries. If you have one of the custom recoveries installed.
  4. Your phone will be continually detected by KIES.
  5. Don't start without firstly enable USB debugging mode!
  6. Battery is sufficient to perform this action.
  7. We will use Odin.
  8. Please to deactivate / disable any antivirus on your pc as it will block Odin from running and also disable your KIES.
  9. Prepare your Windows computer and a USB cable. Do not forget your computer should already has a USB drivers originally from Samsung.
  10. Backup first guys.
Advertisements.

Download the firmware files based on your regions (extract the file).

How to upgrade Samsung Galaxy Grand Prime SM-G530FZ to G530FZXXU1AOA3 (XXU1AOA3) Android 4.4.4 KitKat.


Step 1 - Download ODIN v3.09 to your computer, once it's downloaded, extract its zip file.

Step 2- Boot into download mode, use these buttons; Volume Down + Home + Power while your phone is turned off, keep press those buttons. When you see a warning like in the picture, use Volume Up to continue.
Step 3 - Open Odin now, just click the Odin3 v3.09 file.
Step 4 - Connect your phone to computer, wait for Odin to detect your phone. You will see a picture like this if Odin manages to detect your phone.
Successfully Connected Phone To PC From Odin
Step 5 - Tap the AP from Odin, then search the firmware file, the extension is .tar.md5.
Install CF Auto Root Odin Tool
Step 6 - Do not check anything else, leave the options as is.

Step 7 - Hit the Start button to proceed the installation.

Step 8 - When flashing process takes place, wait til it's done, your phone will reboot.

Step 9 - When your phone is turned on, disconnect it from USB  cable.

Fix bootloop and other errors.

Who knows you may experience a bootloop where you phone is unable to boot normally but get stuck on animation logo. If that's so perform these steps.
  1. Power off your Samsung Galaxy Grand Prime phone.
  2. Now boot into recovery mode, pressing Volume Up + Home + Power to get yourself into that mode.
  3. Within the mode just select the wipe data / factory reset.
    Remember the above action is performing a factory reset, thus you will loose your data afterward, I recommend you have backups before performing the action.
Well done all my friends. Hope you will like the update. See you again in the next posts of Install Android ROM blog.

Install G530FZXXU1AOA6 (ZXXU1AOA6) Update On Samsung Galaxy Grand Prime SM-G530FZ

Samsung Galaxy Grand Prime SM-G530FZ gets an official update after Samsung recently rolled out the G530FZXXU1AOA6 (ZXXU1AOA6) build bringing more optimized Android 4.4.4 KitKat for the phone. You are highly recommended to grab the update now then flash it on your phone to enjoy a better performance using your phone.
Advertisements.

There are three most used methods to update to the stock firmware, one of the most liked methods is manually install the firmware to the device, especially if the availability of it via OTA or KIES takes about one or two days to comes.
Samsung Galaxy Grand Prime SM-G530FZ

Preconditions.
  1. G530FZXXU1AOA6 (ZXXU1AOA6) should be flashed to Samsung Galaxy Grand Prime SM-G530FZ only, do not try it on other model.
  2. Your phone is rooted? You will lose it for flashing this firmware.
  3. CWM or TWRP or any custom recoveries installed on your current phone will be replaced with a stock recovery.
  4. KIES will detect your phone.
  5. Those who use a custom ROM will find a condition they lost their system memory partition for installing this build.
  6. This flashing tutorials require you to firstly enable Android USB debugging mode!
  7. Have enough batter power.
  8. Odin will be used here.
  9. To smooth the process please to temporarily disable both your antivirus and Samsung KIES, re-enable them once the stock firmware is fully installed.
  10. Your Windows, USB drivers and USB cable should be ready.
  11. Make necessary backups!
Advertisements.

Download the firmware files based on your regions (extract the file).

How to update Samsung Galaxy Grand Prime SM-G530FZ to G530FZXXU1AOA6 (ZXXU1AOA6) Android 4.4.4 KitKat.


Step 1 - Download ODIN v3.09 to your PC, then extract it.

Step 2- Power off your phone then power it up using these buttons; Volume Down + Home + Power. A download mode warning will appear, access it using  Volume Up.
Step 3 - Launch Odin now, click on the Odin3 v3.09 file you saved on your PC.
Step 4 - Plug your smartphone to PC, wait Odin to detect it. Added!!! Message will appear indicating your phone is successfully detected.
Successfully Connected Phone To PC From Odin
Step 5 - Now tap the AP via Odin then find the firmware file you previously downlaoded, usuall it has the .tar.md5 extension.
Install CF Auto Root Odin Tool
Step 6 - Leave other options untouched.

Step 7 - Click the Start button now for the installation to begin.

Step 8 - The flashing process takes time. You should see your phone rebooting when it's done.

Step 9 - After it is on, disconnect your phone from PC.

Fix bootloop and other errors.

Hope this doesn't happen to you, however if it does, your phone is stuck in animation logo and doesn't enter to a normal mode. For the situation, you need to perform a factory reset. (Be sure you have backups already).
  1. Turn your phone off completely.
  2. Boot to recovery mode, press these buttons; Volume Up + Home + Power to get yourself into that mode.
  3. Inside the recovery mode choose this option; wipe data / factory reset continued with rebooting your phone.
Done.